One of the most common questions ask by educators once they have migrated their fleet of iPads to ZuluDesk is “How do I install new apps?”
Luckily, this two part process is very simple and takes no time at all.
Step 1 – Purchase or Download from Apple
Login using your Volume Purchase Programme for Education account credentials via https://volume.itunes.apple.com
Search for your desired app
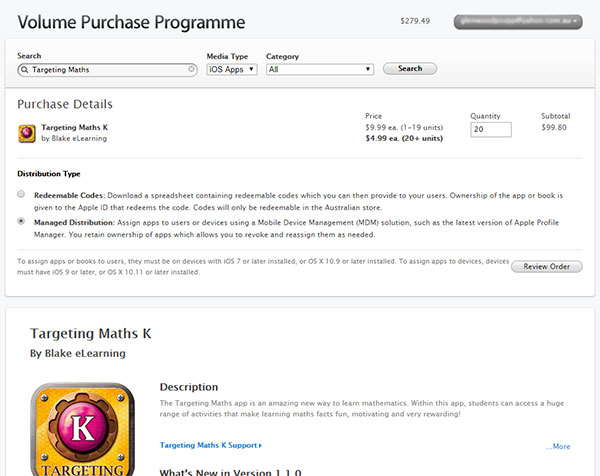
Choose app and review pricing options (note: some developers will offer discounts for bulk ordering of 20+ licenses)
Enter the number of licenses you require (note: you will need 1 license per device)
Select Managed Distribution to assign apps to users or devices using a Mobile Device Management (MDM) solution, which in this case is ZuluDesk
Review order and confirm purchase
Logout
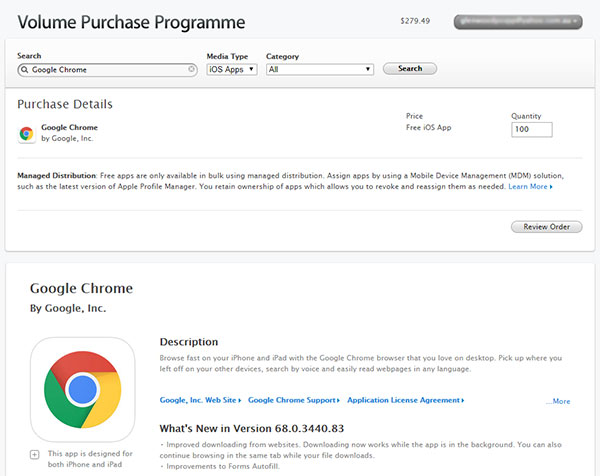
Hint: For FREE apps we regularly select 100 licenses to cover your complete iPad fleet.

Targeting Maths on Volume Purchase Programme for Education

Google Chrome on Volume Purchase Programme for Education
Step 2 – Synchronising VPP and installing app via ZuluDesk
Login to ZuluDesk with your school administrator account via https://zuludesk.com/manage
Click Synchronize Now button to force app to appear in your available app list.

ZuluDesk Synchronize Now
Navigate to Apps in left sidebar
Locate and click on your recently purchase app from the available app list
In the ‘This app will be distributed to the following device groups‘ section choose which group of iPads you wish to install with new app (note: most iPad groups will be separated into stages, ie: Stage 1 / ESL, Stage 2 and Stage 3).
Click Save and then you’re done…simples


This has helped us considerably at Penshurst PS, thankyou for the information.